> ## Documentation Index
> Fetch the complete documentation index at: https://docs.usebracket.com/llms.txt
> Use this file to discover all available pages before exploring further.
# Connecting MongoDB
> Follow these steps to sync an existing MongoDB collection
MongoDB is currently in beta. Might be rough around the edges!
## Optional: Adding Bracket as a user
Perform this step if you would like to give Bracket access through a dedicated account. Skip this step if you prefer to use an existing MongoDB account during setup.
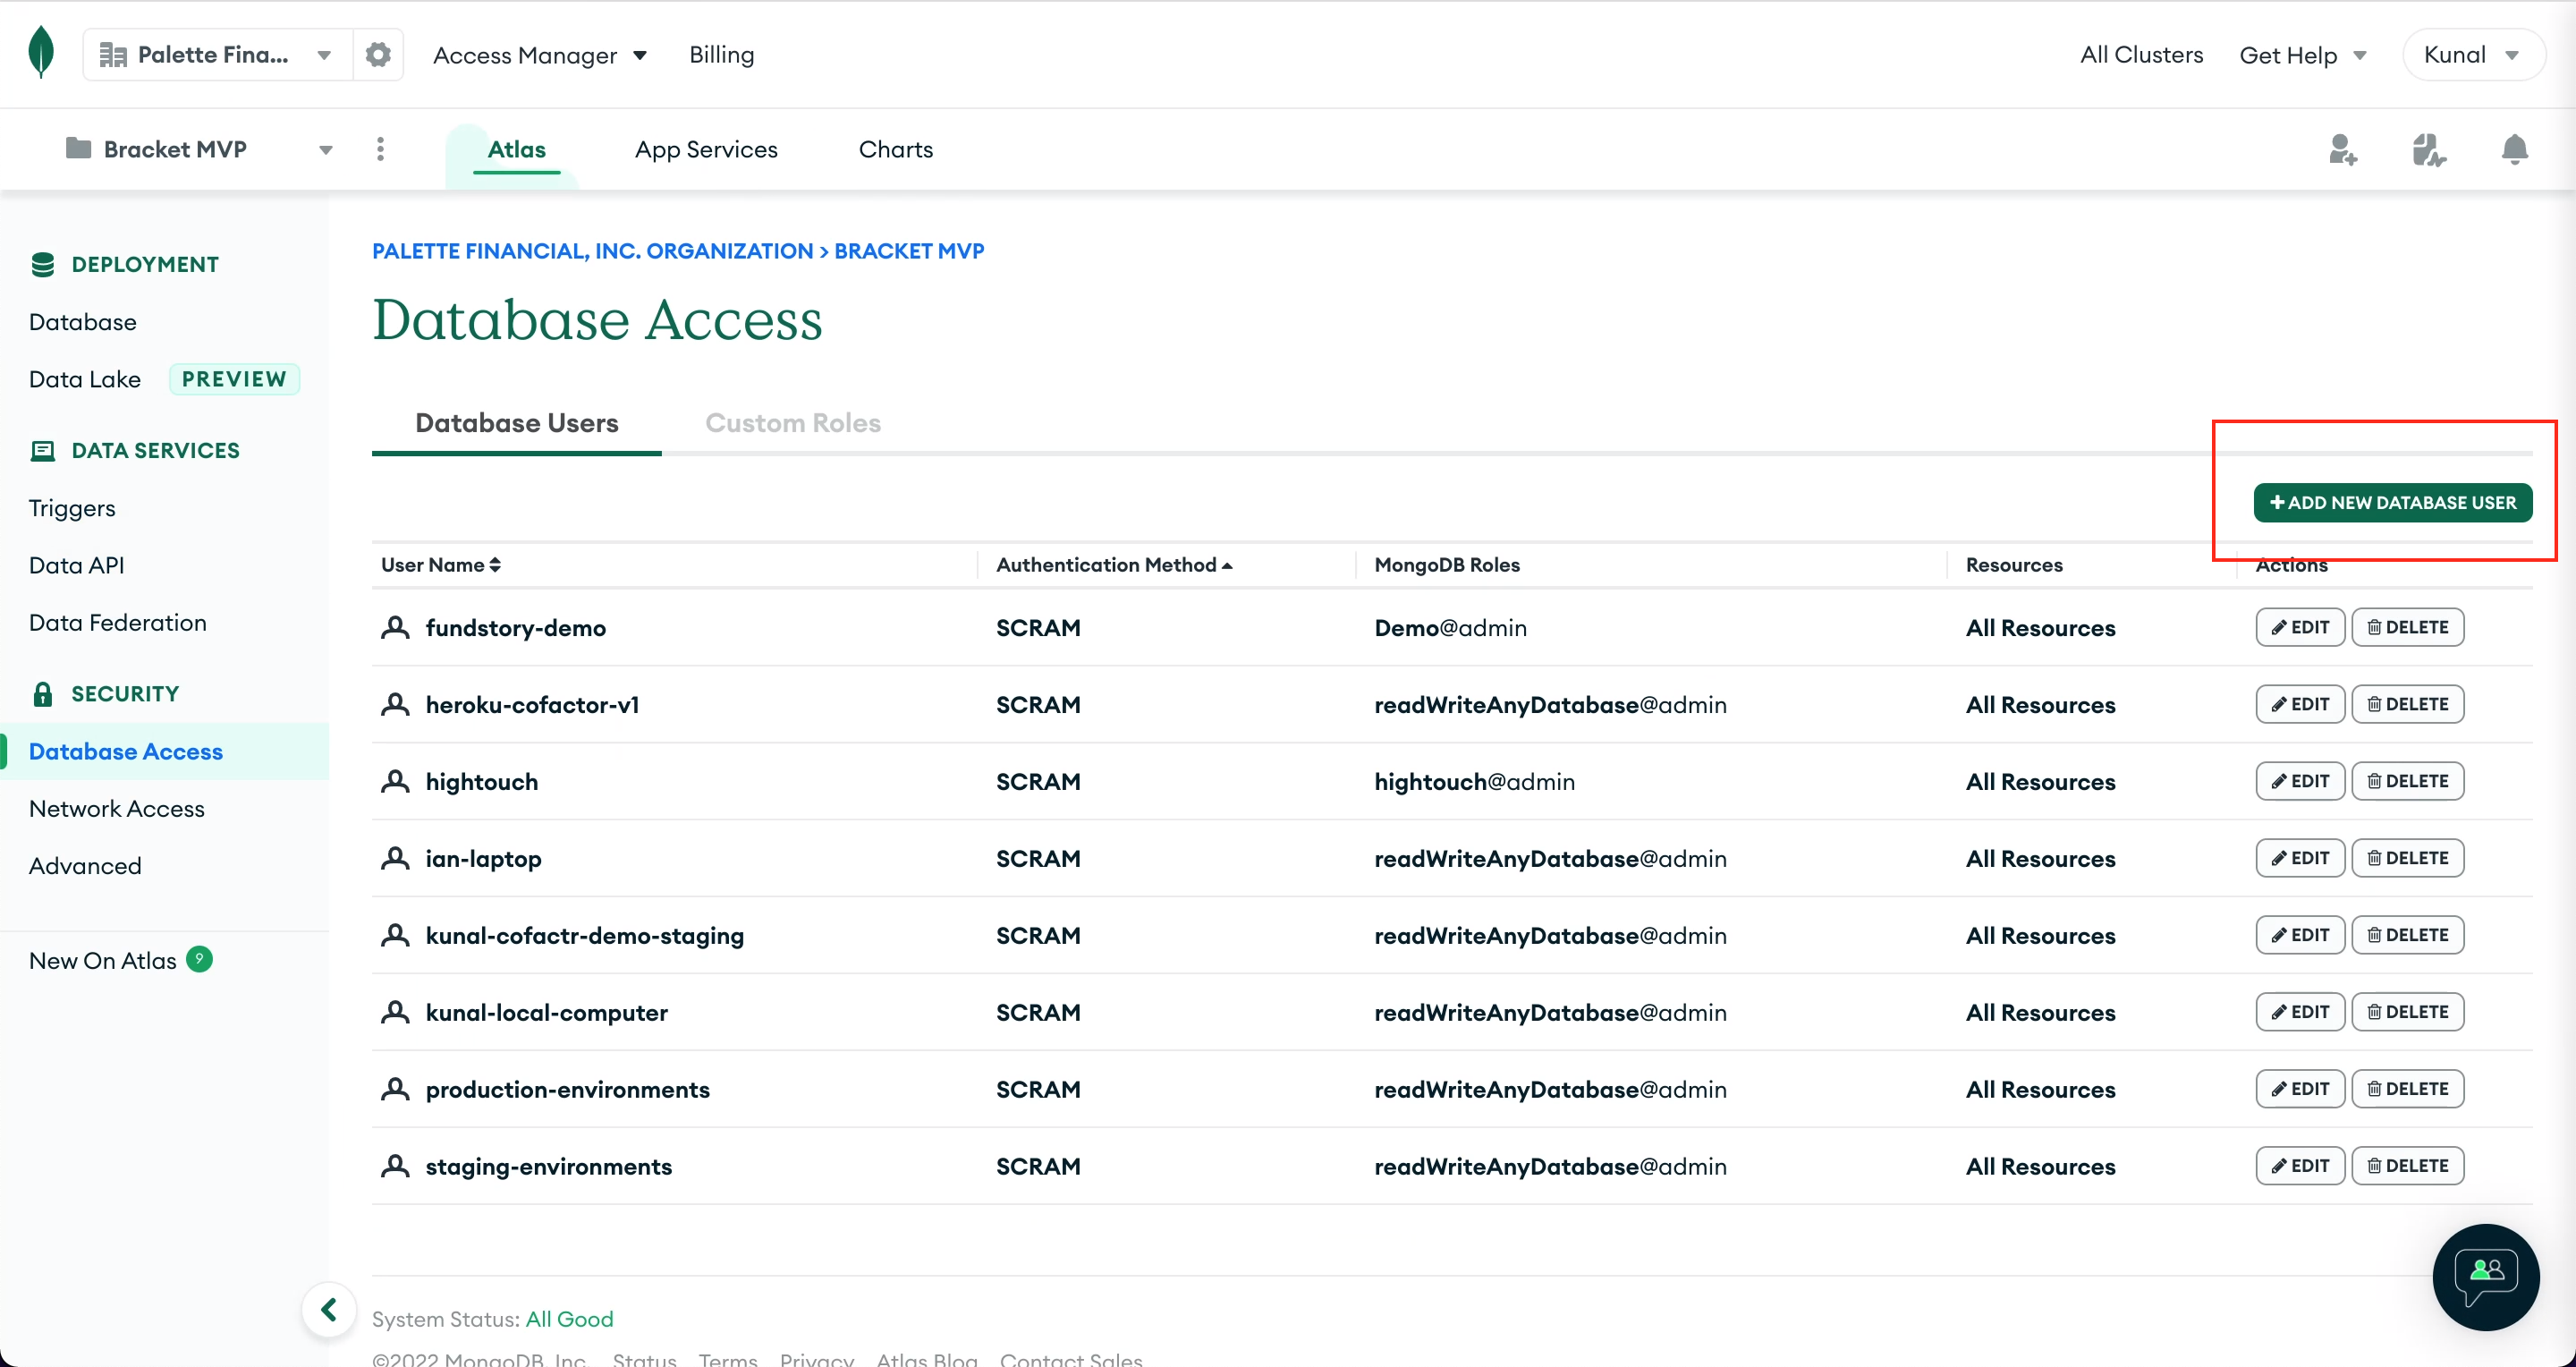
1. Go to `Database Access`
 2. Click `Add New User`
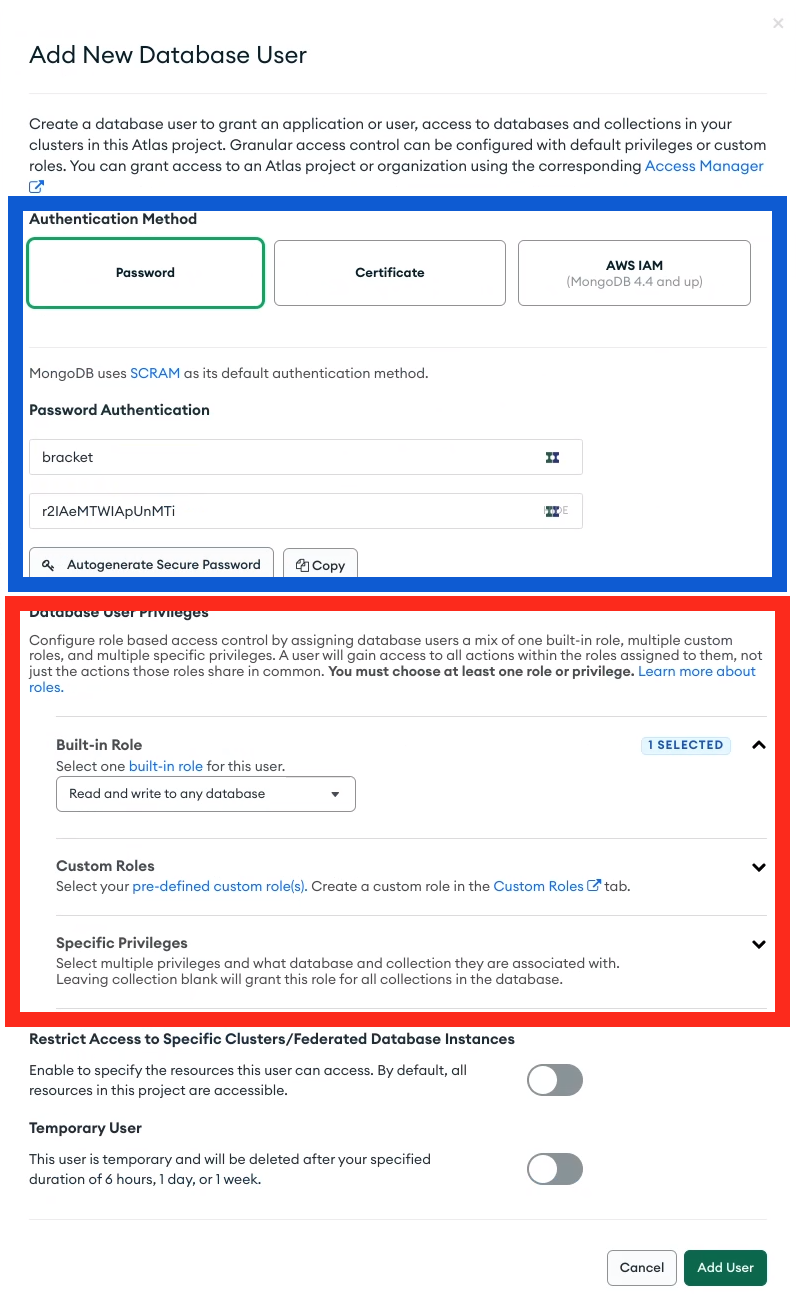
 3. Add a user with username `bracket` and an auto-generated password (blue box below). In the permissions section, select `Read and write to any database` in `Built-in roles` or define a custom role that allows read and write permission to the specific databases you want to connect with Bracket (red box below).
* If you assign a custom role for Bracket, at the minimum it must include read and/or write access for the specific collection that is being synced, depending on the direction of your sync.
4. Copy the username and password, which we'll use in the next step.
3. Add a user with username `bracket` and an auto-generated password (blue box below). In the permissions section, select `Read and write to any database` in `Built-in roles` or define a custom role that allows read and write permission to the specific databases you want to connect with Bracket (red box below).
* If you assign a custom role for Bracket, at the minimum it must include read and/or write access for the specific collection that is being synced, depending on the direction of your sync.
4. Copy the username and password, which we'll use in the next step.
 ## Getting connection string URI
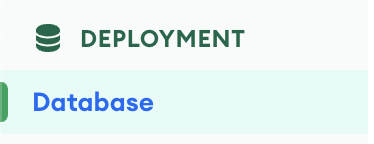
1. Go to the `Database Deployments` page in MongoDB by clicking `Database` on the left sidebar (see below).
## Getting connection string URI
1. Go to the `Database Deployments` page in MongoDB by clicking `Database` on the left sidebar (see below).
 2. Next to the name of the cluster you would like to connect with Bracket, click `Connect`.
 3. Then click `Connect your application`.
 4. Copy the connection string provided, then replace `` and `` with the username and password created for Bracket in the previous step (or with the username and password for an existing MongoDB user). It should have the same format as this:
```shell MongoDB Connection URI theme={null}
mongodb+srv://:@cluster0.at2mo.mongodb.net/?retryWrites=true&w=majority
```
Enter the full URI in the webapp at app.usebracket.com.
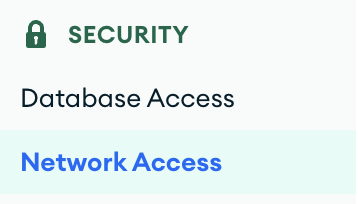
## Whitelisting 0.0.0.0/0 IP address
Navigate to "Network Access" on the lefthand sidebar.
4. Copy the connection string provided, then replace `` and `` with the username and password created for Bracket in the previous step (or with the username and password for an existing MongoDB user). It should have the same format as this:
```shell MongoDB Connection URI theme={null}
mongodb+srv://:@cluster0.at2mo.mongodb.net/?retryWrites=true&w=majority
```
Enter the full URI in the webapp at app.usebracket.com.
## Whitelisting 0.0.0.0/0 IP address
Navigate to "Network Access" on the lefthand sidebar.
 1. Click "Add IP Address".
2. In the "Whitelist Entry" field, type in "0.0.0.0/0" The comment field is optional. Click "Confirm".
Note that whitelisting 0.0.0.0/0 as an IP address makes the database
accessible from anywhere, but does not change the fact that access still
requires a username and password generated by your database administrator.
Alternatively, Bracket can provide a static IP address under the Enterprise plan.
1. Click "Add IP Address".
2. In the "Whitelist Entry" field, type in "0.0.0.0/0" The comment field is optional. Click "Confirm".
Note that whitelisting 0.0.0.0/0 as an IP address makes the database
accessible from anywhere, but does not change the fact that access still
requires a username and password generated by your database administrator.
Alternatively, Bracket can provide a static IP address under the Enterprise plan.