Setting up the sync
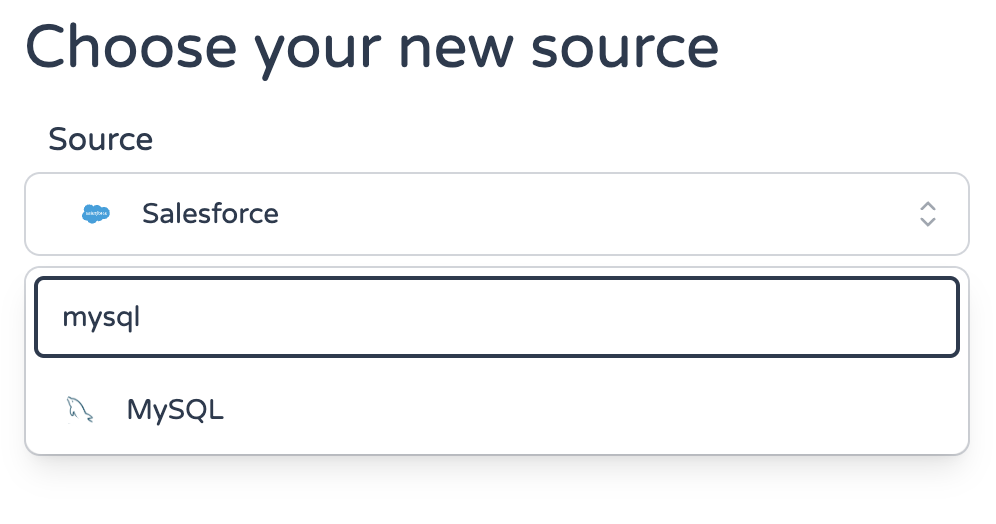
- On the Bracket web-app, for either the primary or secondary source, select “MySQL” from the drop-down.
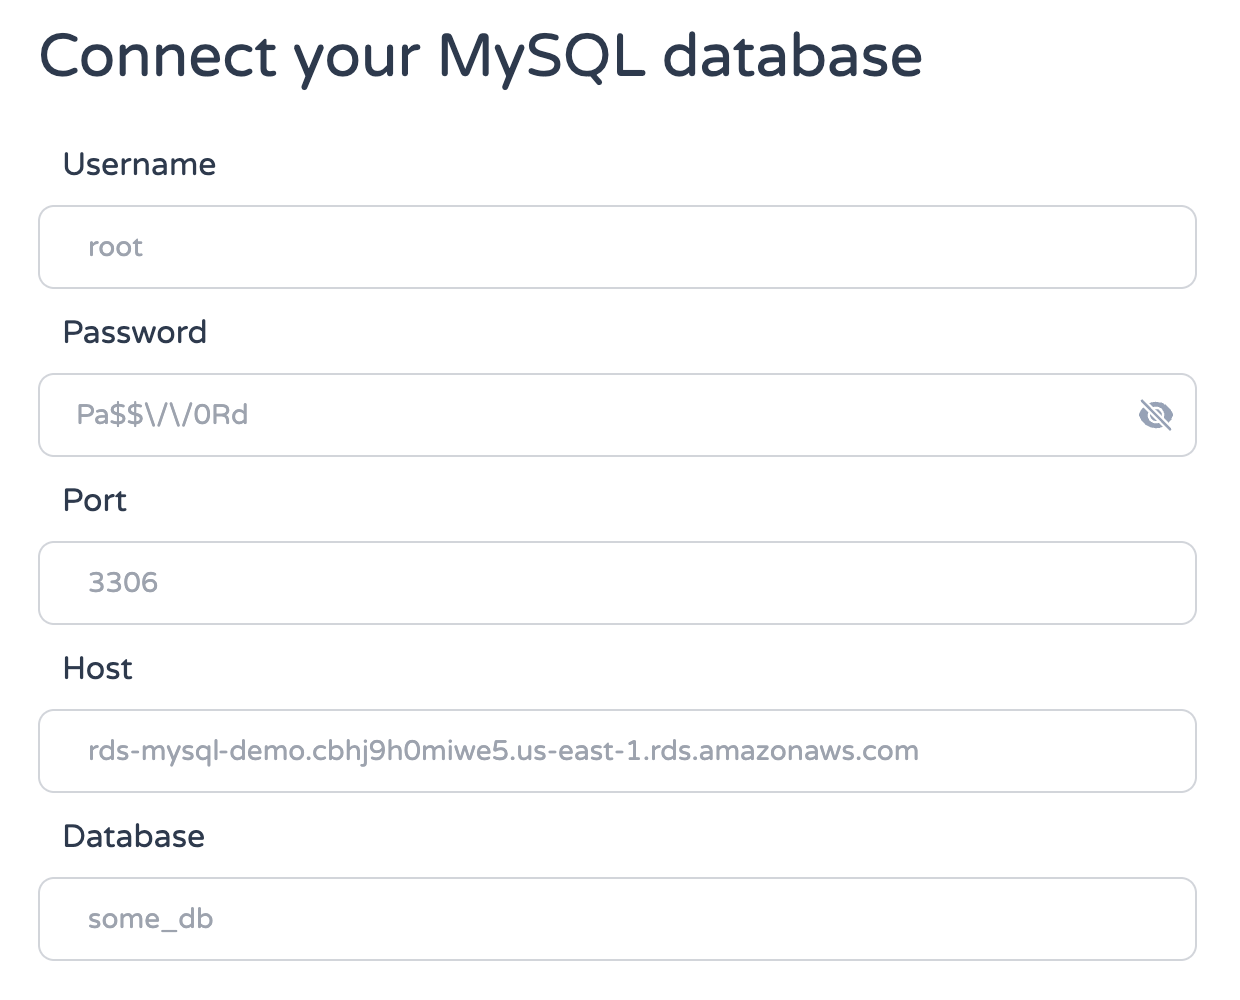
- Enter your MySQL connection details, then click “Next”
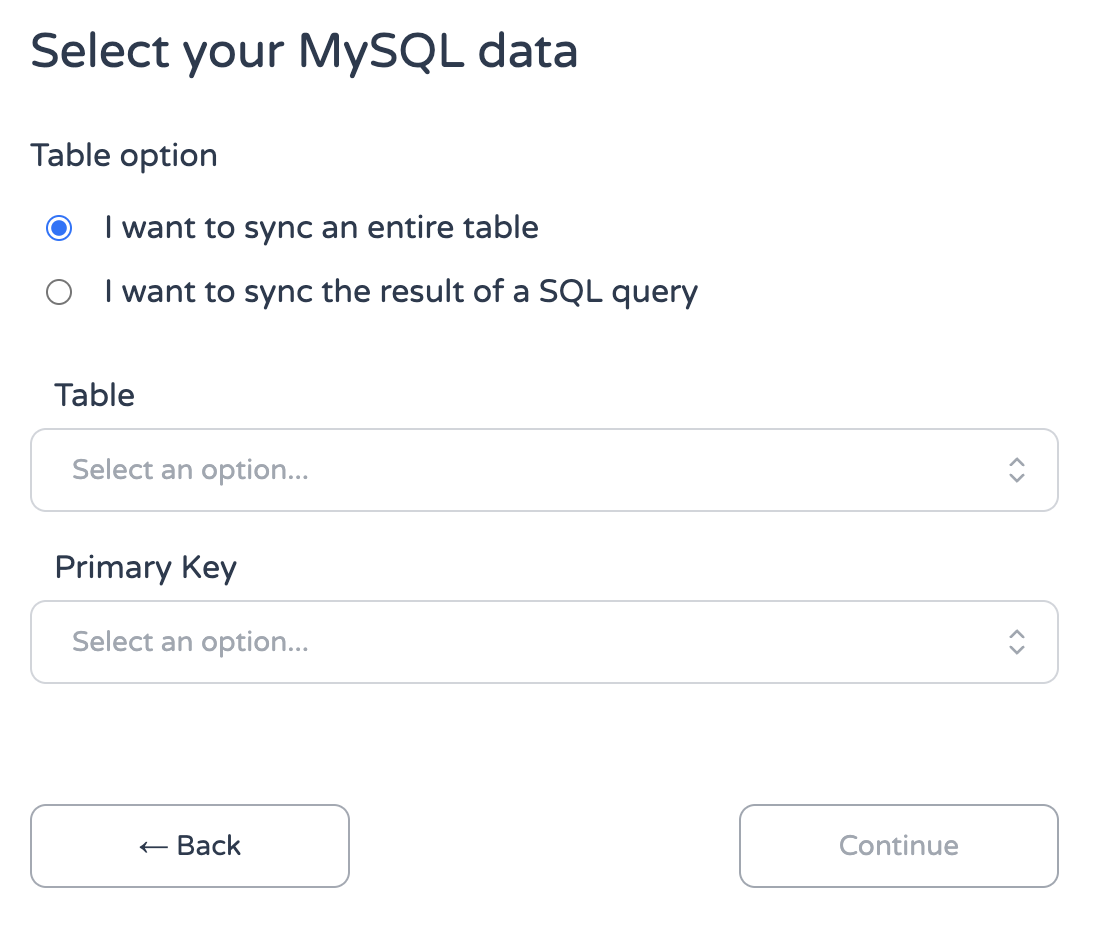
- If MySQL is your primary source, either choose the table from the drop-down menu, or write a SQL statement to produce the data you’d like to sync.
- If MySQL is your secondary source, then either choose to generate a table from scratch (recommended), or connect with an existing table.
- Map your fields and select your sync direction.
- Select your sync frequency and name your sync.
Testing and running your sync
- On the sync overview page, click “Test run” to make sure you are receiving and inserting the number of records you expect.
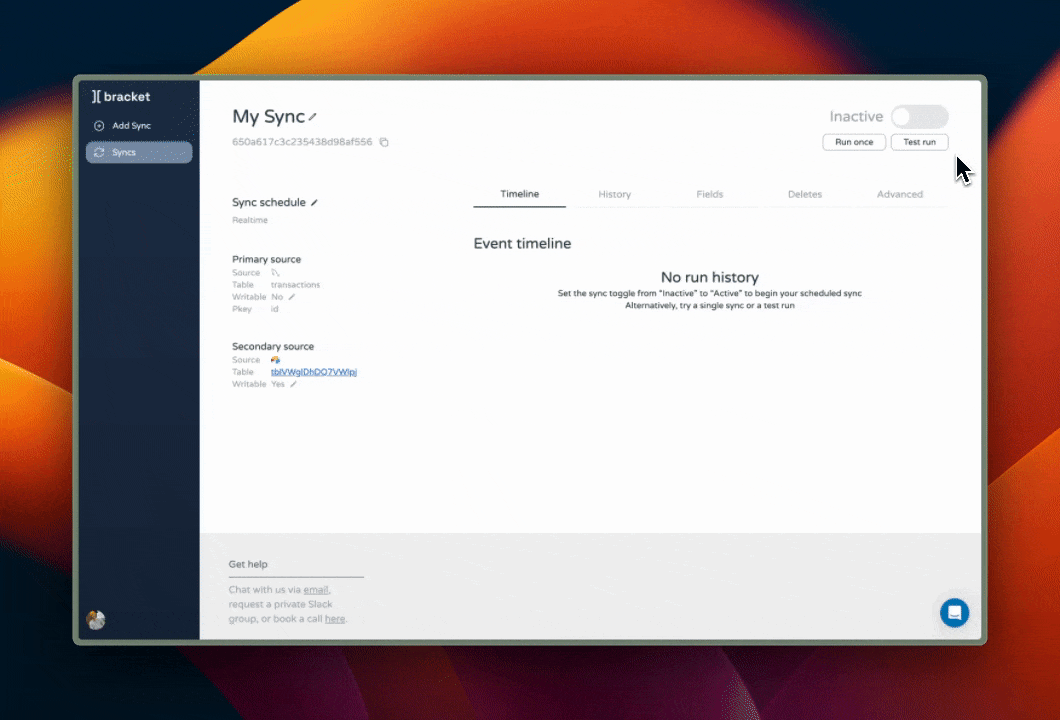
- After testing, click either “Run once” to perform a single run, or toggle the sync to “Active” to start indefinite scheduled runs.
Depending on the size of your data, the first sync run can take significantly longer to run than subsequent runs. It’s rare, but if your initial run takes over an hour, Bracket Support will reach out to you with a custom solution.